Friday, November 15, 2013

Prompt for Enter Computer Name during OSD

If we deploy the OSD task sequence to All Unknown Computers collection, the system will auto generate a random computer name begin with “MININT” for the computer. Below is the guide on how to generate a prompt for the All Unknown Computers collection during the OSD. This guide is not only for All Unknown Computers collection, you can apply the guide below to other collection that need the prompt for entering computer name during OSD.

Very Important!!! The OSD task sequence must deploy as AVAILABLE. The prompt will not work if deploy as REQUIRED.

image
Right Click in the All Unknown Computers collection, and click on Properties

 image
On the Properties window, click on Collection Variables tab. Click the yellow star to add new variable.

image 
Enter OSDComputerName for the variable name. Uncheck Do not display the value in the Configuration Manager console. Click OK.

image
Click OK to exit the Properties window.

Again, make sure you’ve deploy the OSD task sequence as AVAILABLE to the desired collection!!!

Now go to the client computer and boot into WinPE via PXE Boot or Boot Media.
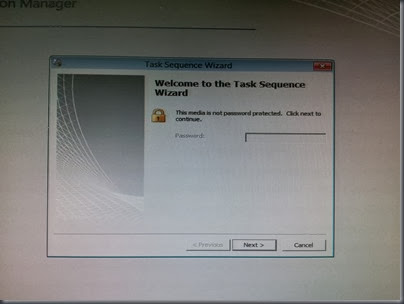
20131115_153657
Click Next on the Task Sequence Wizard
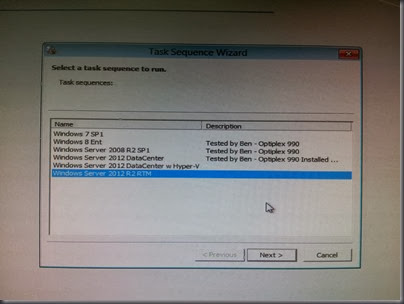
20131115_153712 
Select the desired task sequence and then click Next
20131115_153734
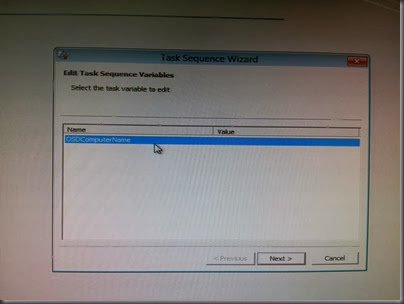
You’ll notice that the wizard prompt to edit the OSDComputerName variable. Double click the OSDComputerName variable to edit.
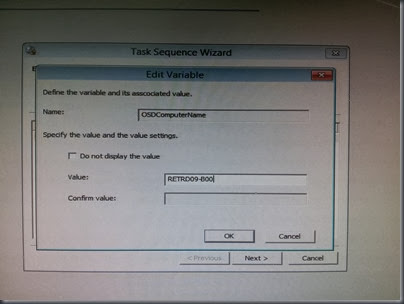
20131115_155616
Enter your Computer Name in the value box and then click OK
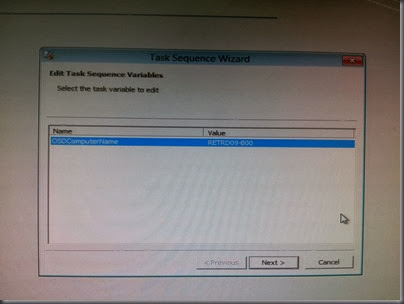
20131115_155632
You’ll notice that the value you entered is appear in the Value column. Click Next to proceed the OSD.

That’s all. Enjoy!!!

Tuesday, November 5, 2013

SCCM 2012 R2: VPN Profiles Step-by-step Guide

SCCM 2012 R2 is now able to deploy VPN settings to users in your organization. VPN Profiles only support the following

  • Devices that run Windows 8.1 32-bit
  • Devices that run Windows 8.1 64-bit
  • Devices that run Windows RT or Windows RT 8.1
  • IPhone devices that run iOS 5, iOS 6 and iOS 7
  • IPad devices that run iOS 5, iOS 6 and iOS 7

Below is the step-by-step guide that I created from my lab.

Configure VPN Profiles in SCCM 2012 R2

image
Navigate to \Assets and Compliance\Overview\Compliance Settings\Company Resource Access and Right click on VPN Profiles. Select Create VPN Profile

image
Specify the Name of the CPN Profile and then click Next

image 
Select the dropdown menu from the Connection type of your vpn connection. I’ve selected Microsoft Automatic for mine.
Click Add to add your vpn server and finally the DNS suffix. Click Next when you’re done.

image
Select the Authentication method from the dropdown menu. I’ve selected MSCHAP v2 for mine.

image
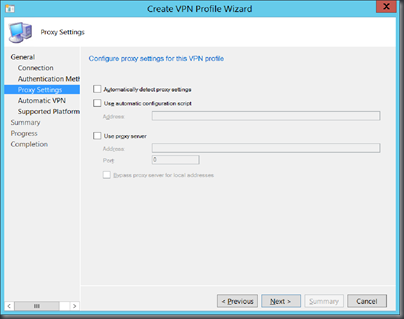
I don’t have any proxy on my lab environment, hence I leave it default and click Next

image
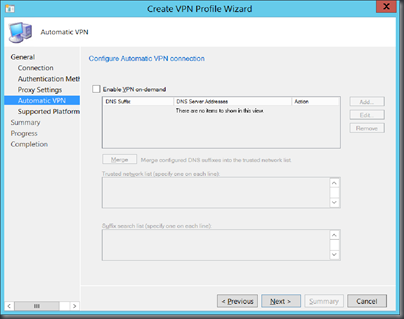
I didn’t configure the Automatic VPN, default settings

image 
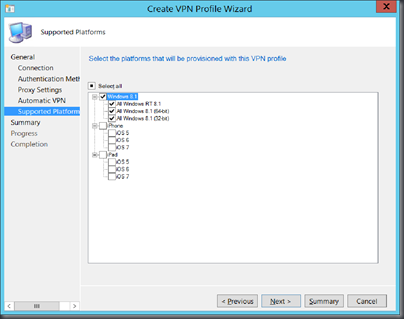
On the Supported Platform, I’ve only selected Windows 8.1 devices for mine

image 
Confirm the settings and then click Next

image 
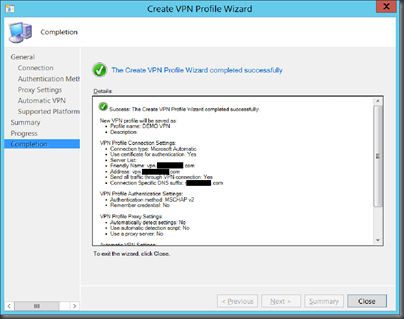
On the Completion page, click Close

Deploy VPN Profiles in SCCM 2012 R2

Now you’ve already configure the VPN Profiles in SCCM 2012 R2. It’s time to deploy to the users that need VPN connection. Yes, you can only deploy the VPN Profiles to User Collections.

image
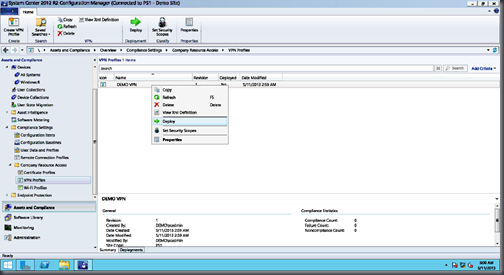
Navigate to \Assets and Compliance\Overview\Compliance Settings\Company Resource Access\VPN Profiles. Right click on the VPN Profile you’ve created, and select Deploy.

image
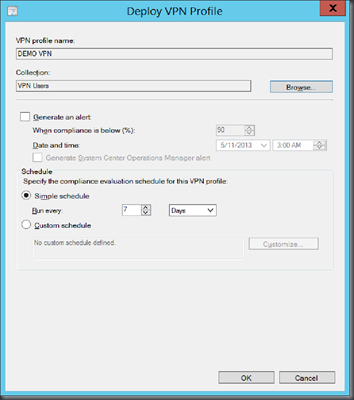
Click on Browse to target the User Collections and then click OK

SCCM 2012 R2 Client

image
I forced the client to grab the policy by running User Policy Retrieval & Evaluation Cycle.

image 
The VPN Profile deployed should appear under Configurations tab after the client receive the policy. Evaluate the policy manually.

image 
The VPN should appear under the Network Connections after the evaluation completed

image 
Click on the Network icon in notification area and you should able to see the VPN connection deployed. Click the VPN Profile and select Connect.

image
Enter the credential and click OK

image
The VPN Profile that I deployed to the lab environment is connected.

Enjoy!!!